Have you ever wondered how to remove insulation safely and efficiently?
Insulation removal is an important task that can improve the comfort and energy efficiency of your home. Below, we will be talking about the insulation removal process.
Whether you’re tackling a renovation or addressing an insulation issue, you’ll find valuable points here. Ready to get started? Let’s begin!
Prepare the Area
Before you start removing insulation, it’s important to get the area ready. First, clear the space of any furniture or items that might get in the way. Make sure the floor is clean and there are no tripping hazards.
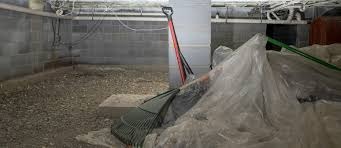
Next, put on your protective gear. This includes gloves, a mask, and safety glasses. Seal off the area with plastic sheets to keep any dust and debris contained. This will protect other parts of your home and make attic cleanup easier.
Gather Necessary Tools
Before you start with the insulation replacement, you will need some tools. Get a utility knife to help you cut through the insulation. Have some heavy-duty trash bags ready for disposing of the old insulation.
A vacuum cleaner, preferably a shop vacuum, is essential for handling dust and small bits of insulation. A flashlight will also be useful for illuminating dark areas. With these tools, you are ready to start the job.
Remove Old Insulation
Removing old insulation might seem challenging, but it can be straightforward with the right steps. Begin by carefully pulling insulation away from walls or the attic floor. If the insulation is in batts or rolls, gently lift them and place them in trash bags without pressing too much to avoid creating more dust.
For loose-fill insulation, use a vacuum cleaner to suck up the material. Take your time and work in small sections to ensure you get all the insulation. Deposit any old insulation into heavy-duty trash bags.
Once you’ve removed the insulation, double-check the area to ensure nothing gets left behind. This way, your space will be clean and ready for new insulation if needed.
Clean the Space
After you’ve taken out all the insulation, it’s time to clean up. Use a shop vacuum to pick up any loose bits and dust. Check the walls, floors, and corners to make sure no insulation pieces are left behind.
Wipe down surfaces with a damp cloth to remove any remaining dust. Be thorough so the area is spotless.
Cleaning the space helps make sure it’s ready for new insulation. It also keeps your home safe and healthy by removing potential allergens.
Install New Insulation
You can now put in the new insulation. Choose the right type of insulation for your home and follow the product instructions.
Place the insulation snugly between the studs or rafters, ensuring there are no gaps. This will help keep your home warm in winter and cool in summer.
If you need help, consider hiring a professional company like Anthem Insulation Company. Doing so will ensure the correct installation of your insulation. Once complete, you’ll have a more comfortable and energy-efficient home.
Do Insulation Removal Right With These Steps
Completing the insulation removal process can make your home more comfortable and energy-efficient. By following these steps, you can address old insulation issues and upgrade your home’s performance.
Remember the importance of each step from preparation to installation. Proper insulation removal can make a significant difference in your home’s energy bills and overall comfort.
Are you looking for other helpful content? If so, stay with us and continue reading for more.
Stay in touch to get more updates & news on houseyzone!


