

Introduction
Laying sleepers for garden edging is a fantastic way to add structure and definition to your outdoor space.
Whether you want to create neat flower beds, prevent soil erosion, or enhance the aesthetic appeal of your garden, sleepers offer a robust and stylish solution. But how do you get started?
Don’t worry; we’ve got you covered with this step-by-step guide that will walk you through the process, making it as easy as pie. Ready to transform your garden?
Why Choose Sleepers for Garden Edging?
Traditionally used in railway tracks, sleepers have found a new life in gardens. They are durable and versatile and offer a rustic charm that suits various garden styles. Using sleepers for garden edging can help:
- Define Garden Borders: Clearly separate different areas of your garden.
- Prevent Soil Erosion: Keep soil and mulch in place.
- Add Aesthetic Appeal: Enhance your garden’s visual appeal with natural wood textures.
Materials Needed
Before you start, gather the following materials:
- Sleepers: Choose from timber or reclaimed railway sleepers.
- Saw: For cutting the sleepers to size.
- Shovel: To prepare the ground.
- Spirit Level: To ensure your sleepers are level.
- Drill and Screws: For securing the sleepers.
- Gravel or Hardcore: To create a stable base.
- String and Stakes: These are used to mark out the edging line.
Planning Your Garden Edging
Planning is crucial for a successful project. Here’s how to do it:
- Measure the Area: Determine the length of the garden edge where you will lay the sleepers.
- Design the Layout: Decide whether you want straight lines, curves, or a combination.
- Calculate Materials: Determine how many sleepers you need based on your measurements.
Preparing the Ground
A solid foundation is key to long-lasting garden edging. Follow these steps:
- Clear the Area: Remove any grass, plants, or debris from the planned edging site.
- Dig a Trench: Dig a trench slightly wider than the sleepers and about 6 inches deep.
- Add a Base Layer: Fill the trench with gravel or hardcore to create a stable base and ensure proper drainage.
Measuring and Cutting the Sleepers
Accurate measurements and cuts are essential for a neat finish:
- Measure Twice, Cut Once: Measure the sleepers to fit your layout, allowing for any corners or joins.
- Cut the Sleepers: Use a saw to cut the sleepers to the required lengths. Wear safety gear while cutting.
Laying the First Sleeper
The first sleeper sets the stage for the entire project:
- Place the Sleeper: Position the first sleeper in the trench.
- Check the Level: Use a spirit level to ensure the sleeper is perfectly horizontal.
- Adjust as Needed: Add or remove gravel under the sleeper to achieve a level position.
Fixing the Sleepers in Place
Secure the sleepers to ensure they stay in place:
- Drill Pilot Holes: Drill pilot holes through the sleepers to prevent the wood from splitting.
- Screw the Sleepers: Use long screws to secure the sleepers to the ground or to each other for added stability.
Adding Additional Layers
If you want a taller edging, add more layers of sleepers:
- Stack the Sleepers: Place additional sleepers on top of the first layer.
- Secure the Layers: Drill and screw the layers together to create a sturdy structure.
- Check the Level: Ensure each layer is level before securing it.
Finishing Touches
Complete the project with some final adjustments:
- Fill the Gaps: Fill any gaps around the sleepers with soil or gravel.
- Trim Edges: Use a saw to trim any overhanging edges for a neat finish.
- Sand Rough Edges: Sand down any rough edges to prevent splinters and give a polished look.
Maintaining Your Sleeper Edging
Proper maintenance ensures longevity:
- Regular Checks: Inspect the sleepers for any signs of rot or damage.
- Treat the Wood: Apply a wood preservative to protect against weathering.
- Weed Control: Keep the area around the sleepers weed-free to prevent damage.
Creative Ideas for Sleeper Edging
Sleepers offer a canvas for creativity. Here are some ideas:
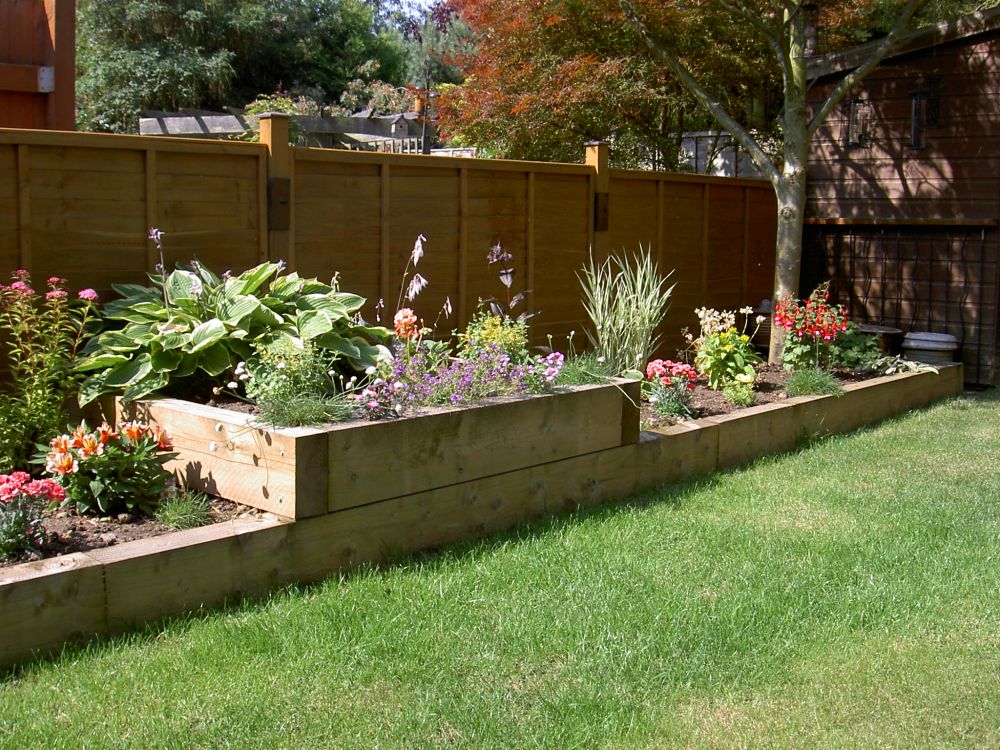
- Raised Beds: Use sleepers to create raised garden beds.
- Seating Areas: Incorporate sleepers as seating along your garden edge.
- Pathway Borders: Define pathways with sleeper edging.
Common Mistakes to Avoid
Avoid these pitfalls for a successful project:
- Skipping the Base Layer: Not adding a gravel base can lead to instability.
- Ignoring Levels: Uneven sleepers will look unprofessional and can cause drainage issues.
- Wrong Measurements: Always double-check measurements to avoid wasted materials.
Cost Considerations
Understand the costs involved:
- Materials: The price of sleepers can vary based on the type and source.
- Tools: Factor in the cost of any tools you need to purchase or rent.
- Labour: If you hire help, include labour costs in your budget.
Conclusion
Laying sleepers for garden edging is a rewarding DIY project that can significantly enhance the look and functionality of your garden. You can create beautiful and durable garden borders with careful planning, the right materials, and attention to detail.
So, roll up your sleeves and start transforming your garden today!
FAQs
1. What type of sleepers should I use for garden edging?
Timber and reclaimed railway sleepers are popular choices for their durability and aesthetic appeal.
2. How deep should the trench be for laying sleepers?
A trench about 6 inches deep is generally sufficient to create a stable base for the sleepers.
3. Can I lay sleepers directly on soil?
While you can, it’s better to lay a gravel or hardcore base to ensure stability and proper drainage.
4. How do I prevent sleepers from rotting?
Apply a wood preservative and ensure proper drainage to extend the life of your sleepers.
5. Can I install sleeper edging myself, or should I hire a professional?
Laying sleeper edging is a manageable DIY project for most people, but you can hire a professional if you prefer.