

Do It Yourself Wall Art doesn’t have to be an expensive or daunting task. With a little creativity and effort, you can create stunning wall art that not only adds personality to your space but also showcases your unique style. This article will guide you through everything you need to know about Do It Yourself (DIY) wall art, including ideas, materials, techniques, and tips to help you unleash your inner artist.
Why Choose Do It Yourself Wall Art?
DIY wall art offers numerous benefits beyond cost savings. Here’s why more people are embracing this creative outlet:
- Personalization: Tailor your art to match your taste, decor, and theme.
- Budget Friendly: Save money by using readily available materials or upcycling items.
- Creative Outlet: Express your creativity and develop new artistic skills.
- Sense of Accomplishment: Feel proud of the pieces you make and display.
- Eco Friendly: Reuse and recycle items to create sustainable art.
Essential Tools and Materials for Do It Yourself Wall Art
Before diving into specific project ideas, it’s important to gather some essential tools and materials. While the exact items depend on the type of art you plan to create, here’s a general list to get started:
- Canvas or thick paper
- Paints (acrylic, watercolor, or spray paint)
- Paintbrushes and sponges
- Tape and glue
- Scissors and utility knife
- Ruler and stencils
- Frames or hanging hardware
- Crafting tools like glue guns, needles, or embroidery hoops
Having a well stocked kit allows you to experiment with a range of techniques and mediums.
Popular Do It Yourself Wall Art Techniques and Ideas
Popular DIY wall art techniques and idea each catering to different skill levels, styles, and materials. These approaches allow anyone to personalize their space affordably and creatively:
1. Canvas Painting
One of the most accessible and flexible forms of Do It Yourself Wall Art is painting on canvas. You don’t need to be a professional artist to create something beautiful.
- Abstract Painting: Use broad strokes, splatters, or geometric shapes. Acrylic paints work well for this because they dry quickly and are easy to layer.
- Stencil Art: Use stencils to create clean, repeatable designs like mandalas, quotes, or floral patterns. This is perfect for beginners.
- Minimalist Art: Stick with a monochrome palette and simple lines to produce chic, modern pieces that go well with any decor style.
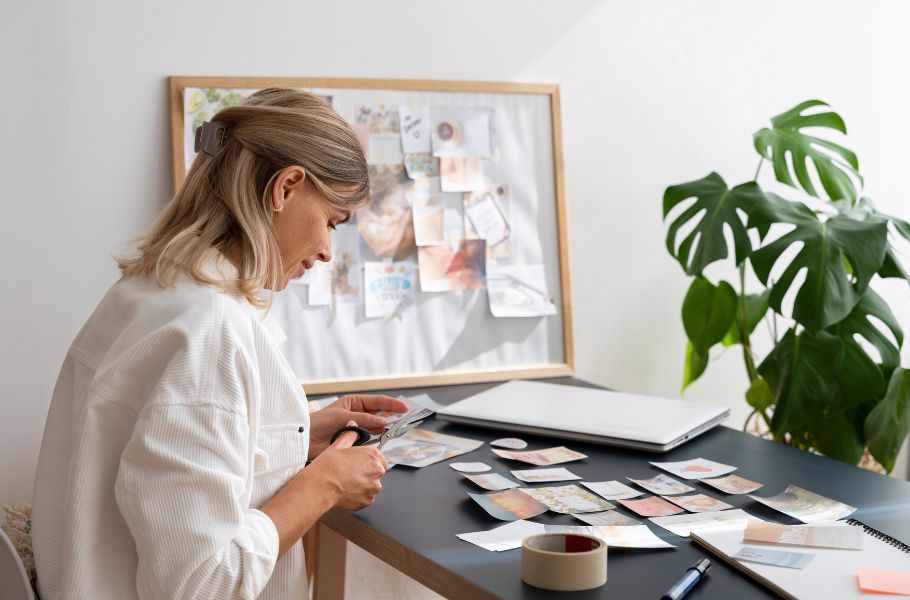
2. Wall Collage
Create a wall collage using photographs, postcards, magazine clippings, or scrapbook paper. You can arrange them in a grid or freeform shape.
- Vision Boards
Combine images, quotes, and goals to make a vision board that’s both decorative and motivational.
- Themed Collages
Choose a specific theme, such as travel or nature, and curate your images to reflect that narrative.
3. String Art
String art involves wrapping colored thread or yarn around nails arranged in a pattern on a wooden board.
How to Create String Art:
- Sketch your design lightly with pencil.
- Hammer nails into the design outline.
- Wrap string around nails to fill the shape, alternating colors for depth.
This technique is great for making hearts, initials, or geometric patterns.
4. Fabric and Textile Art
Use textiles to add texture and warmth to your wall decor.
- Macrame
Create boho chic pieces with knots and cords. This trend is especially popular for its intricate patterns and natural look.
- Quilted Wall Hangings
Patch together colorful fabric squares into patterns and mount them for a cozy, artistic vibe.
5. Nature Inspired Art
Bring the outdoors inside with art made from or inspired by natural elements.
- Pressed Flower Frames
Collect and press flowers, then frame them for a delicate, romantic touch.
- Leaf Prints
Dip leaves in paint and press them onto paper or canvas for a botanical look.
6. Typography and Quote Art
Typography and quote art is a powerful and visually striking way to personalize your space with meaningful words, whether it’s a favorite quote, a motivational saying, or a simple word that brings you joy. This technique blends graphic design, calligraphy, and creativity.
1. Hand Lettering
Hand lettering is the art of drawing letters by hand, distinct from calligraphy (which uses pen pressure for stylized writing).
Materials Needed:
- Brush pens, fine liners, or paint markers
- Cardstock or canvas
- Pencil and eraser
- Ruler for guidelines
Tips:
- Sketch in pencil first for layout planning.
- Use online tutorials to practice letterforms.
- Experiment with different styles: cursive, serif, block letters.
2. Stencil Lettering
Ideal for crisp, repeatable letters. You can buy ready-made stencils or create your own with cardstock and a craft knife.
How to Use:
- Secure stencil over your surface with painter’s tape.
- Dab paint or sponge ink through the cut-out letters.
- Remove stencil carefully to avoid smudging.
3. Printable Quotes
If you prefer a clean, digital look, use graphic design software (like Canva or Adobe Express) to create printable art.
Steps:
- Choose a background (plain, gradient, photo).
- Pick an elegant or playful font depending on your vibe.
- Add your quote and save it in high resolution.
- Print and frame it.
4. Chalkboard Art
For temporary or rotating quotes, use a chalkboard or chalkboard-painted surface.
Materials Needed:
- Chalkboard or chalkboard paint on wood
- Chalk markers for detailed, smudge-proof lines
- Wet rag or eraser for edits
Great for kitchens, home offices, or entryways, this lets you change quotes with the seasons or your mood.
7. Upcycled Art
Use everyday objects to make new, eye catching creations.
Bottle Cap Mosaics
Glue colorful bottle caps into patterns or shapes for a textured, eco friendly design.
Old Window Frames
Use vintage window frames as a base to hang photos or art pieces.
Step by Step Guide: Creating a Do It Yourself Wall Art Abstract Canvas Painting
Here are the do it yourself wall art step to step guide
Materials Needed:
- Blank canvas
- Acrylic paints
- Paintbrushes and palette knives
- Painter’s tape (optional)
Steps:
- Lay your canvas on a flat surface and plan your design.
- Choose a color palette that matches your room decor.
- Use painter’s tape to block off sections if desired.
- Apply paint using brushes or knives for different textures.
- Let each layer dry before adding new ones.
- Once satisfied, let it dry completely and hang it up!
Tips for Successful Do It Yourself Wall Art
- Start Simple: Begin with basic techniques and work up to more complex projects.
- Practice First: Test your designs on paper before committing to canvas or walls.
- Mix Mediums: Don’t be afraid to combine paint, fabric, and found objects.
- Measure Your Space: Know the dimensions of your wall to plan appropriately.
- Use a Level: When hanging, ensure your art is straight for a professional finish.
Incorporating Do It Yourself Wall Art into Your Home Decor
DIY wall art can elevate any space, from bedrooms and living rooms to kitchens and home offices. Here’s how to integrate it seamlessly:
- Gallery Walls: Mix Do It Yourself Wall Art pieces with framed photos and prints for a curated look.
- Statement Pieces: Create one large focal artwork for a minimalist but bold approach.
- Thematic Displays: Use color schemes or themes to tie multiple pieces together.
- Functional Art: Combine aesthetics and function, like chalkboard walls or corkboards.
Common Mistakes to Avoid
- Overcomplicating Your Design: Simple often looks better and is easier to execute.
- Ignoring Lighting: Poor lighting can dull the impact of your work. Use spotlights if necessary.
- Using Poor Quality Materials: Invest in decent tools and materials for lasting results.
- Not Preparing Surfaces: Whether it’s a canvas or a wall, make sure surfaces are clean and primed.
Conclusion
Do It Yourself Wall Art is a fulfilling, economical, and stylish way to personalize your living space. Whether you’re painting on canvas, creating string art, or upcycling materials, there are endless possibilities to explore. With a bit of planning, creativity, and the right tools, you can transform any blank wall into a stunning visual experience that reflects your individuality. So, gather your materials, find inspiration, and start creating your very own masterpiece today!
FAQ’s About do it yourself wall art
Q1: Do I need to be artistic to create DIY wall art?
Not at all! Many DIY wall art projects are beginner friendly and don’t require advanced skills.
Q2: What is the cheapest form of DIY wall art?
Collages and printable quotes are among the most budget friendly options.
Q3: How do I choose colors for my DIY wall art?
Use a color wheel or choose tones that match your existing room decor.
Q4: Can kids participate in DIY wall art projects?
Absolutely. Many projects are kid safe and can be a fun family activity.